Join the TSS Yahoo Group!

Tuesday, June 29, 2010

Colored Pencils on Metal!!?? Why not!! :)

Yeppers.  Another metal experiment.  I am a little disappointed in the outcome of this experiment. But, I do think with a few adjustments, it can turn out much better.  So........ let me tell you what I did (and show the results) and then I'll tell you what I think it will take to turn out better! :)
-------------------------------------------
First, I have been smitten by the notion of drawing on metal with colored pencils.  I have seen a matte black metal that is designed for drawing.  I have not ordered any of the metal because it is rather expensive.  Then I thought, why not try and make some out of what I have??!! 
-----------------------
I took some of my Rock Star Black metal from Ten Seconds Studio and sprayed 2 medium coats of PYMII on it.  (PYMII is an acrylic sealer.... super fabulous stuff!  Great for sealing all sorts of projects, including metal!!)  This gives the metal some "tooth" to take the colored pencil.

On the top, the PYMII coated metal.  Below (on the scrap piece of metal) colored pencil over untreated metal.


I ran the coated metal through my Big Shot Machine. (used a Cuttlebug folder.... Holly)  You can see (sorta) that I debossed the metal. (i.e. the pattern is sunk in on the front and puffed out in the back)


Then I colored in the debossed areas with colored pencil.  This is what it looks like unaltered after coloring.


This is the effect you can get if you sand the pattern after coloring. (Obviously you need to be a little more careful with your sanding!! :)

So.  Overall, I think the technique has possibilities!!  Now, how to make it better??
-----------
1) Freehand embossing should give better results.  The 90 degree (almost) angle of the Cuttlebug folder image is too sharp.  It is very difficult to color the entire image w/out getting it on the edge of the image.  You could try to use extremely sharp pencils to try and avoid this problem.  So, next time I will try to do a freehand image and I bet the results will "pop" more off the metal.

2) Two additional coats of PYMII should give a more even coloring surface.  I think the pencils will take better with a couple more coats of sealer.  Also, using lighter colors obviously will make the image contrast more w/ the black surface.

3)  Improve my coloring skills!  LOL!!  I think this technique could look really beautiful if colored by someone with a little more talent! :)

4) Just a note.  This technique could also be done with the Brrrrrrr Blue, Dark Chocolate, Barn Red, and Plum metals.  (The darker colors of metal) 
====================


Now, I did try a little somethin' somethin' with a couple of leftover scraps.  I think these would make really cool embellishment pieces!!
-------------------

I took a piece of the coated metal and used my colored pencil to emboss the image (instead of my paper stump) 
Then I sanded the image.  You can see the cool colored bits of metal under the sanded image.  I think it looks pretty nifty!


Here is another example using a very light blue pencil over the coated black metal.  Again, coooooooooooool! :)

So, overall I think my experiment has possibilities! :)   Another medium that could be used:  Chalk pencils! 
Remember that you will have to seal over the colored pencil or chalk after you finish your piece.  You can use the PYMII over non-permanent mediums.

Thursday, June 24, 2010

A Metal Mosaic Experiment

I don't know about you, but I really liked the Mosaic Technique on Taco Tuesday this week. :)  Someone on the TSS Yahoo Group suggested that maybe you could put together the mosaic on top of a piece of Humungo Double Sided Tape FIRST, and then die cut the mosaic. 
 (this was presented by: Lori H aka "llhassle")
-----------------
I thought this was a great idea!!  I gave it a shot!! :)  I decided not to worry about the gaps inbetween the metal pieces.  I filled them with "grout"!
----------------
I took a scrap piece of Humungo Tape about 4x4 inches.  I peeled the backing off and carefully put on top of my craft sheet.  I cut up a bunch of scrap pieces of metal and randomly put them together over the exposed sticky-side of the tape.  After I was done, I cut out 4 flower shapes with my Tim Holtz Alterations Die.  One medium flower and 3 small flowers.  After I cut out the shapes, I filled in the exposed gaps with extra fine glitter. (my grout!)  I stuck one small flower over the medium flower and placed a blingy brad in the center.  I just added the blingy brad to the other small flowers as well.
------------------
I think they turned out pretty cool!  A little funk-i-fied, but cool! :) :)  What do you think??!! 


Wednesday, June 23, 2010

TSS Yahoo Group - Our first SWAP! :) ATCs

Hi!  Well, I have set up our first Swap over at the new Ten Seconds Studio Yahoo Group!!  We are starting "easy" with some ATCs.  I thought I'd share my progress with you as I work through my creations for the swap.
----------------------
One of my most favorite "art things" to do is make backgrounds.  I just love the freedom of abstract art. Slopping around with paints and inks...... doesn't get much better! :)   I came up with an idea to use the TSS molds in my background! (I'm sure many others out there have already done this!:) 
-------------------------
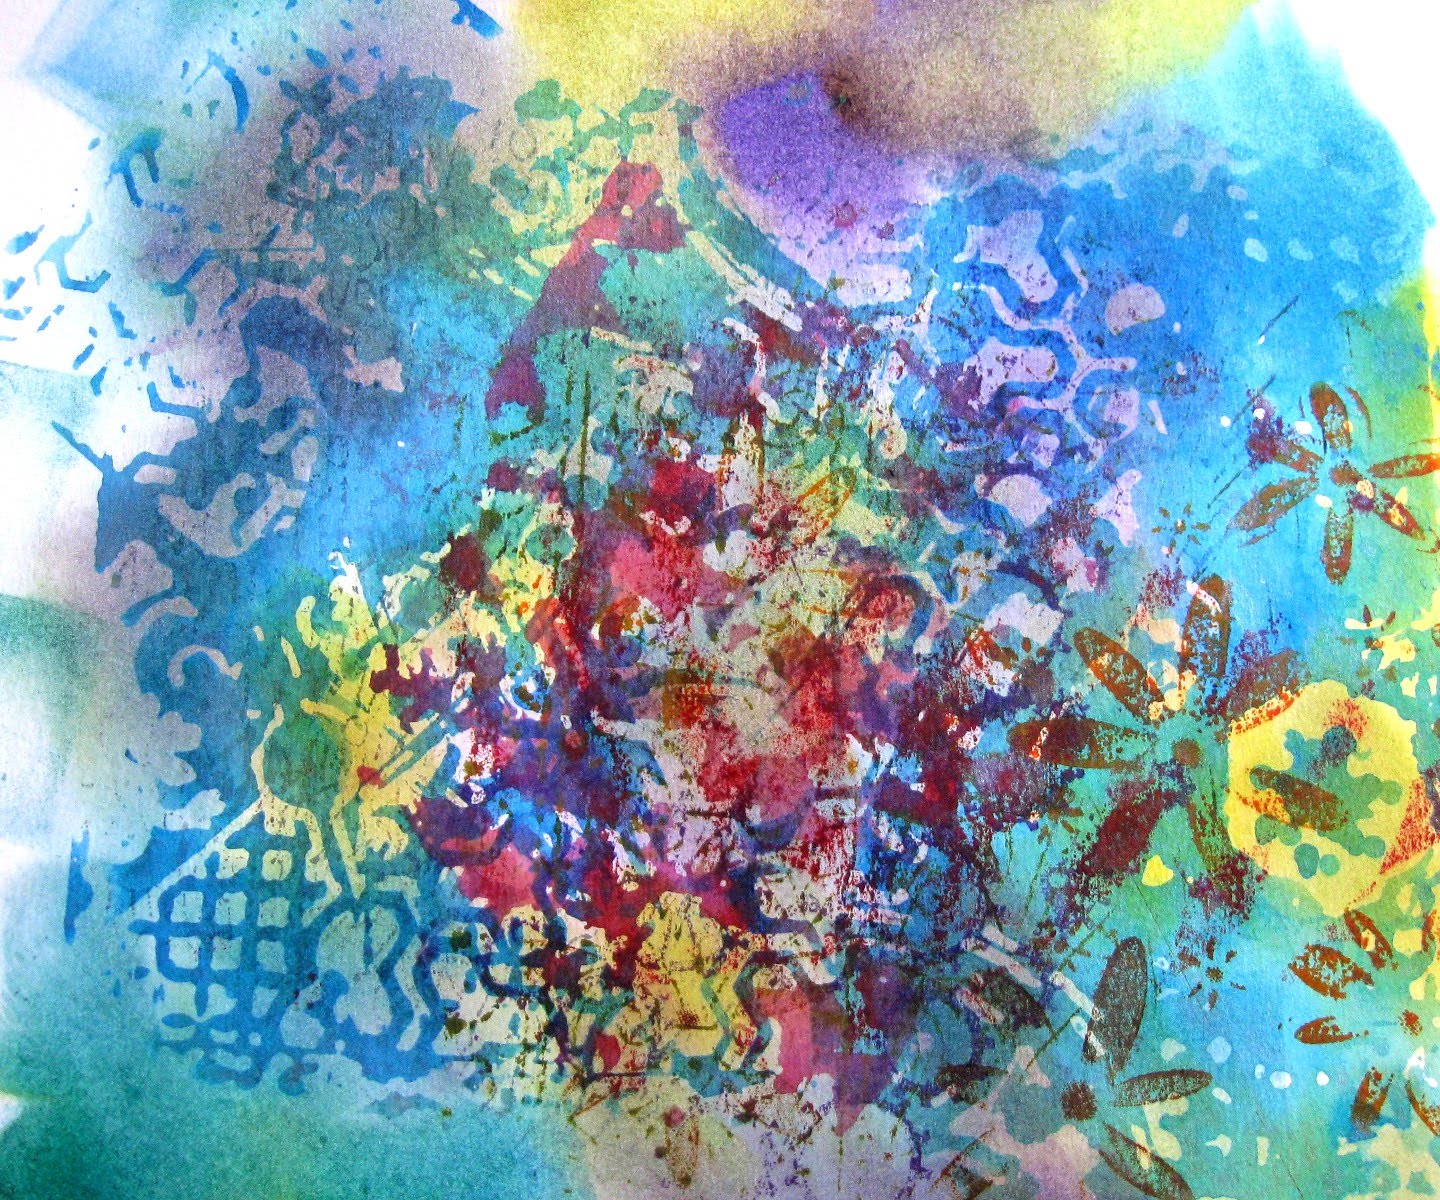
I started with some heavy watercolor paper.  I dabbed some of my Starburst Stains onto several of the TSS molds (can you find them??:)  Then I "stamped" the molds onto the watercolor paper.  There was a lot of puddling and generalized spreading of ink, but you can still make out the basic images of the molds.  After the Starburst Stains dried, I did the same thing again with Distress Inks.  After that layer dried, I then used my Tim Holtz Blending tool to "fill in" the blank spots with more Distress Ink.
You can see the full sheet here:
(You cannot see the shimmer from the Starburst Stains here.... it is really neat because they peek out from behind the Distress ink...pretty!)


--------------------------
After all of the inks dried, I then cut 4 base pieces for my ATCs.  Here they are!! :)


Who knows what the next step will be?!!  That's the fun of it, isn't it??? :)  Stay tuned.........
(p.s. If you'd like to join in on the fun, the sign up deadline for the swap is not until July 9.  Come join the group and play! :)

Wednesday, June 9, 2010

Finished the Embossed Dog and made a Mosaic Frame

Yippie!  I actually finished off the "All Dogs Go To Heaven" project that I started with my metal embossing kit for the Cricut from Chomas Creations.  The girl I made this for is a hippie wannabe, so I made it in sort of a grungy, tie-dye style.  I hope it doesn't make her too sad.......

=======================

I also actually executed a project that I envisioned a while ago!  WooHoo!! :)  I wanted to make a mosaic frame from UTEE and metal.  I thought it would look pretty cool!  I used the Ten Seconds Studio molds for the patterns on the UTEE.  I did a freehand pattern on the metal.  I used Rock Star Black metal and black UTEE.  I cut the UTEE pieces while it was still warm.  I embossed and sanded the metal and then I cut it up into pieces.
========
I took a cheapo square wooden frame that I got from Michael's and covered it with the Humungo 2 sided tape from TSS.  I cut out the hole in the middle and trimmed the sides.  Then I painted the edges.  Now, I SHOULD have painted the frame first......  oh, well.
============
I placed all of the pieces of UTEE and metal on the frame.  After I got it to look the way I wanted, I filled in all of the spaces with microbeads. I highlighted the UTEE pieces with Perfect Pearls.   I touched up around the middle of the frame with some paint.  I put in a photo and VOILA.... my altered item project for our local fair! :) :)

Super fun and pretty darn easy!


Tuesday, May 25, 2010

Is There Such a Thing as Cheating in Art??????

Yippie!!!!  I got to play with my new toy!!  I ordered an Embossing Kit for my Cricut Expression!  I was hopeful that it would work well on the Ten Seconds Studio metal..... I am NOT disappointed!!! :)  I think it turned out great!  I feel like I'm cheating!! LOL!! :)
I ordered it here:  Chomas Creations
-----------------------------------
I know there are those out there that say you can emboss by turning your blade upside down.  But, because I plan on embossing metal A LOT, I wanted a dedicated tool for that purpose.  To me, this is worth the money!  The embossing cartridge is very sturdy and the mat worked great!! 
----------------------- 
Here is my first attempt and I'm very pleased!!!!
I wanted to make a card for my daughter's friend who just had to put her doggie down yesterday.  She was very attached to the poor poochie, so I hope this will remind her that "All Dogs go to Heaven".  (I'll post my final card when I get it done)
-------------------------------

First, I found this cute image online:
Then I converted the image in Inkscape to a file to import into SCAL to cut with my Expression. 
(SCAL is a third party software program you can use with your Cricut to cut out shapes.  You are not longer restricted to images on the cartridges)
----------------------------------


--------------------------------------
I set the program to Multi-Cut 3 times.  I think 2 would have been enough, but 3 certainly did not hurt anything!! :)
-------------------------------

Here is a close up of the back of the metal after the machine got done embossing.

-----------------------------------
Here is what the front looked like after I took it out of the machine.
Notice the roller marks on the image.  These are very superficial and I was able to easily erase them. 


-------------------------------

Here is the image after I refined it.  Terrible pic, but you can see that the roller marks are no where to be seen! :)  


-----------------------------------
Here is the image trimmed and sanded.  I think it turned out cute, don't you??!!  :)


Tellin' ya, loving this gizmo!!!!  I really think I'll be using it A LOT!!
For all you Metal Heads out there, come join our new Yahoo Group!  TenSecondsStudio Yahoo Group
Come play and learn with us!!!!!
C Ya Soon!

Monday, May 24, 2010

Come Join the new Yahoo Group!!! TenSecondsStudio

You like metal??  You love metal embossing??  Are you a fan of Ten Seconds Studio and Taco Tuesday???  Come join the new Yahoo Group!!!  Come share your techniques, experiments,  and projects or just lurk and learn!!
See ya there!:

Wednesday, May 12, 2010

Last Teacher Gift 3rd Grade - Lemons to Lemonade!!

Whew!  Talk about ducking under the wire!  I just found out yesterday that Miss R.'s last day is THIS FRIDAY!!  (Miss R is the student teacher in my son's 3rd grade classroom)  She is fabulous and will make an awesome teacher!!  The kids love her!  I found out that she is a licensed pilot. (Wow!)  So, Amelia Earhart was my inspiration for my final teacher gift of this year. 
--------------------------
I designed my layout and then went to embossing some Ten Second Studios metal (this time Brrrrrrrrrrrr Blue....  I thought it was a good "flying" color)  I traced the bird and did all of the lettering freehand.  The subtle backgrounds are 2 Sizzix texture plates that I have in my stash. :)  I really do love this quote and I think it translates well to both a teacher and a pilot! :) :)
-------------------------
So here is my lemon story.  When I was done embossing, refining, sanding and basically all of the time consuming work, I cut out the design to fit the plaque. 
==============
AAAAAAAAAAARRRRRRRRRRRGHHHHHHHHHHH!!!!
=================
  I could not believe it!  I was so totally OFF it was not funny!  I was close to tears!!!  It looked terrible!  "Suck it up, Susan!!"  Ok.  Regroup.  Deeeeeeeeeep breath. (where did I put that Jack Daniels??....... wait, that won't help [ok, it might have made the cut look straight after a while])  I know!!  Curvy!!  Curvy is good!.  So, enter the "curvy" left-hand side distressed with some acrylic paint.  Whew! 
Lemonade is served!!!!!!!!!!!
----------------------------
Hope you like it Miss R!!!!!
(click on image for a closer look!)

This piece is sealed with PYMII to protect the paint from being worn or scratched off!  Great stuff!!!!!!

Sunday, May 9, 2010

Another Teacher Gift! :) I love METAL!!

Ok.  Why can't my son have one teacher like normal kids??  Noooooo........ he has to have 2 teachers and a student teacher in his class!!  So, here is Teacher Gift number 2!!  (this is for his "Friday" teacher)  Mrs. "L." job shares and comes in on Fridays.  She is the "fun" teacher!  LOL!!!  She covers art/science/poetry/current events, etc.  She is a great gal and the kids LOVE her!  (as well as their M-Th. teacher, Mrs. Brown)  She has a thing for shoes and quotes.  So, here is the gift that I made for her.  I figured a Dr. Seuss quote would be appropriate for a 3rd grade teacher.
---------------------------------

I used the FABBY new metal color "Peacock" from Ten Second Studios.  It is a beautiful color.  It reminds me of Hawaii and tropical flowers.  I found the flip flop image and the poem online.  I designed my layout and then embossed away! :)  I used the TSS flower mold for the background and the flip flops have a Sizzix plate design on them.  I did puff the straps of the flip flops, so I spackled the back.  Note to self:  let spackle dry BEFORE you try and adhere double sided tape.
-------------------------

Thanks for a great year, Mrs. L!  Hope you like it!


This piece is sealed with PYMII to protect the paint from being worn or scratched off! Great stuff!!!!!!

Thursday, May 6, 2010

Metal Flowers: C.R.A.P.

Well, I have been inspired! :)  I was watching the Taco Tuesday over at Ten Second Studios this week.  They had an awesome tutorial on making metal flowers.  You can see it here:  http://www.tensecondsstudio.com/videos/050410.html
I really liked the flowers made in the tut, but wanted to try something a little different.  Then I saw another great tutorial on a blog:  Crafting in Croatia on how to make rosettes from paper spirals. 
I decided to combine the two and I came up with my version of a metal flower. 
I dub thee:  C.R.A.P.!   California Rosettes and Peonies  (LOL  ok, a stretch, but I had to make the acronym work!  hee hee)
---------------------------
I cut a piece of square metal, embossed a quickie pattern on it with one of my Ten Second pattern molds, sanded the metal, cut a freehand spiral with patterned scissors, and rolled it up like in the Nina B Designs blog tutorial.  I worked the metal quite a bit after it was rolled..... bending and squishing and "fine tuning" the flowers.  I added a little bling in the middle .........and........... voila!
------------------------------

Whattya think???????
(click photo to see more detail)

Friday, April 16, 2010

Stamped Blog Candy!! (Some Cards n' Stuff.......)

APRIL 23, 2010
**WINNER!!**
FibreJunky said...


What a nice thing to do!!
Carole
=======
Carol, I'm sending you an email.. Send me your snail mail addy and I'll get your candy out to you!! 
Thanks to all who "played" this week.  I'll be posting MORE candy on Monday! ;)
Hi All!
I have decided to give away some of the cards and tags I have made over the years.  Hopefully they can go to homes where they will be appreciated and not sit in a lonely box in the closet!!! :) :)
For a chance to win this group of cards/ATCs/tags, just leave comment and I'll draw a name at random next Friday. (April 23, 2010)  Make sure you leave your email address so I can contact you next week to get your address!!!!  :)

***If you are feeling creative and like GRAB BAGS, check out my auction on Ebay.  I'm "cleanin' out the stamping drawers"!!  Awesome stamps.... many retired or from companies no longer in business!!!***
You can see the listing here:

Have a great weekend!!!!!
xoxoxoooxoo

Thursday, April 8, 2010

More Metal and THANKS, CHERYL!! :)

Well!  I'm very excited to have a shout out from Cheryl Darrow over at Ten Seconds Studio's Blog!  Thanks!!!!  Kyle and I are loving our metal and playing with it!!  (Kyle has his own paper stump and burnishing block) Here are a couple of pieces that my son, Kyle, has done.  (and, for the record, he is 9 :) :)
====================================
Here, Kyle used decorative wheels to emboss a "cover" for his DSi gaming system.  No one will mistake Kyle's game for their own! :)


This sign will be hung on Kyle's bedroom door.  Very important, girls, that you have a ticket to enter......  I'll have to find out if Mom's get a waiver.


Here is Kyle and his latest creation.  A Super Mario characature for his wall.  (we may frame and put in the living room! :)

=====================================

Here are 2 pieces that I recently finished.  I just love this saying!!  LOL!!!  For any of you out there with teenage children, you know what this is all about!!  This will hang on my daughter's bathroom door! :)


And, here is a Monogram.  I'm not too crazy about how it turned out, but I finished it off anyway.  I like the color combo......just not too crazy about the entire piece.  But, what the hey......... I can always "enhance" it later!! :) :) :)


Off to sort through my new birthday toys that came in the last couple of days!!!!!  Hasta la pasta!
xoxoxxoxoxoxoxoxo

Friday, April 2, 2010

Early Teacher Gift - Metalized Coffee Plaque

I've had this idea swirling around in my head for quite a while.  My son's 3rd Grade teacher is quite the Starbuck's Maven.  I envisioned a coffee cup and coffee terms on a plaque for her wall.  I  hope she likes it! :)
==============================

I used the Ten Seconds Studio Dark Chocolate metal for my piece.  The coffee cup image is actually a cut file that this INCREDIBLY talented man created.  You can see oodles of fabulous images designed by this man on his blog here:  http://scale-files.blogspot.com/   Thanks, Paulo!!!  :)
====================================
I printed out his image and then traced onto tracing paper.  Then I taped the tracing paper to the back of the metal and used my refining tool to outline the image onto the metal.  I then "freehanded" the lines and sayings on the front of the metal.  Therefore the coffee cup image is embossed on the front and the lines and sayings are debossed.  :) :)  I then sanded the entire piece, wiped clean and adhered to a Big Lots Plaque I bought for $1.25!! :)  (It had this awful image of an apricot on it.... it just peeled right off! :)  I glued a piece of wallpaper to the back and then added the eyes for the hanging wire.
As a final touch, I sealed the entire piece with Preserve Your Memories II.  Because the piece is uncovered and may be touched, (who doesn't want to touch metal and feel the "ins and outs"?? :) I wanted to make sure that the piece is protected.  PYMII is a fantastic product for protecting and sealing ALL sorts of projects.  Paper, metal, clay, waterbased inks and paints, pencil and graphite.... the whole enchilada!!  LOVE IT!! :) 
========================================

Mrs. Brown Plaque Front
CLICK PHOTO TO SEE LARGER IMAGE


Mrs Brown Plaque back:
Hope you like it, Mrs. Brown!! :) :)  Happy EARLY end of the year!

Wednesday, March 24, 2010

More Embossed Metal..... Purty Flowers

Holy Posting, Batman!  2 in one day?????  I think I'm done for the year!  LOL

Here are a few more pieces I did the other day on my "art play day".  I took some aluminum sheet metal (in a roll) and cut out shapes with my Sizzix Big Kick.  Then I embossed the metal using Ten Seconds Studio molds and a couple of Cuttlebug Embossing folders.  Then I painted with the Tim Holtz Adirondack Paint Dabbers(by Ranger).  Love the colors of this paint!! :)  After the paint dried, I sanded the flowers/leaves so the embossed pattern shows up nicely! :) 
------------------------------
The great thing about using metal is that you can then bend and fold the pieces to give a really nice 3D effect.  I have the flowers/leaves arranged on a canvas board that I colored waaaaaaaaay back when dinos walked the earth.  I do believe I used some of my homemade color wash on it! :)  Now, I just need to find the perfect photo and frame it up!!!!
==========================

8x10 Canvas board with metal flowers:


Close up of the flowers and leaves:

Heavy Moving and Metal!!

Well, let's see............
Happy Thanksgiving, Merry Christmas, Happy New Year, Happy MLK Day, Happy Presidents Day, Happy Valentines Day, and Happy St. Patty's Day.  Whew!!!!  I think I'm all caught up now! :)
Let's just say.........moving is NOT fun!!
-----------------------------------------------
Waaaaaaaaay back in December, I got a whole bunch of Ten Seconds Studios toys for Xmas.  (If you have not seen a "Taco Tuesday", you must go check out the site!!  Fantastic product and tutorials....and, a terrific blog!!)  I have finally been able to find some time to play with them a little.  Here is one piece I did.  I just have to find the rest of my "stuff" so I can mount it for a wall display! :)

I started with a Fred Mullett fish stamped on the back of the metal in StazOn ink.  I then embossed the outline, fins, and face.  I was going to try and emboss all of the little scales, but decided that my refiner was not small enough to do them justice.  So, I improvised and "filled in" my fish with one of Ten Seconds Studios molds. (Big Mama Alphabet Mold:  BM05)  Then I refined, sanded, and did a touch of Payne's Grey acrylic paint over the image.  I then used one of my texture wheels to add the "water" around the fish.  I'm pretty happy with it for my first try! :)
===================================


Here is the stamped image of the fish on the back of the metal:


Here is the front:

Monday, November 2, 2009

Gary Farrell Art Show!!!!! WooooHooooo!!

OMGosh!! I have been stressing and working for months on my pieces for my first art showing! :) My friend, Sherre, and I have the November Art Display in the Gary Farrell tasting room!! It is very exciting!!!!! I was able to finalize my last pieces THIS MORNING!!!! (lol... how typical!!)
Here is the tasting room and our pieces! :) Come by in person if you are local..... it's a GORGEOUS tasting room!!
(p.s. Thanks, Mom!! for helping us set up!!)
-----------------------
Leaf prints on cotton panel by me, grape painting by Sherre, small leaf print by me:
Framed leaf prints by me:
Paper collage by Sherre:
Grapes by Sherre, Leaves by me:
Same wall, different angle:
Leaf print and embossed copper leaves on grape branches by me, grape paintings by Sherre:


Embossed copper leaves by me:

Close up of one of my embossed copper leaves and grape branch:


Overall, I'm very pleased on how the room turned out!! Sherre's pieces are fabulous and I think our work compliments each other nicely! A big pat on our backs, Sherre!!!!! Yay, us! :)
(p.s. all of my prints and canvas pieces are protected with PYMII. I really have to plug them here.... fantastic product for protecting your work!! check it out here: http://www.precision-blue.com/)

Sunday, October 18, 2009

Blog Candy Link and Checkin In

Just a quick note to say HI! I have not fallen off the planet, but I'm trying to spend all of my spare time on some art projects for a November deadline. I'm still quite BEHIND!!!! :)
However, since one can never have too much stuff, here is a link to some awesome blog candy!!!! Check it out and Happy October!
xoxooxoxooxoxxo
Susan

Tuesday, September 8, 2009

An ATP Swap! :)

Hi All! :)
School is in session and I'm hoping to get back to some creating!! (I better find some time because I have a showing in the Gary Farrell Winery tasting room in November!!)
==============
Here is my latest creation. An "Artists Trading Pin" for a swap over at the Arttechniques Yahoo Group. I used some "starts" I had from my Tim Holtz class a few months ago. I "jazzed" them up a little and ....... voila! a pin! :)
=============
The flower is made from Grunge Paper, a button, a little wire, flower die cuts, Glimmer Mist, Radiant Rain, Distress Inks, Archival Inks, and rubber stamps. The butterfly is Grunge Board, Distress Inks and Stickles, and some Mica Magic Ink.
Hope my partner enjoys her pin!!!!! :)
===============
Click on the Pic for a nice close up!